

By Sally Roth
North Forty News
The shocked looks and “Eww!”s are a big part of the fun of Halloween makeup. “Even if you’re just pretending to be a zombie, or someone with a black eye or a gash on their head, you get to see others react to you in a different way than you’re used to,” says professional film makeup artist KLT Stewart of rural Bellvue.
But the artistic creativity is satisfying, too. “Improvising is fun!” says Maya Gates of Fort Collins, who takes a casual approach to Halloween makeup, using inexpensive products to create scary effects.

Makeup fan Maya Gates of Fort Collins uses “basic drugstore makeup” to create this skull effect.
Quick and Easy Skull
“All you need is a soft black pencil eyeliner, liquid eyeliner, black eyeshadow and white creme makeup,” says Maya Gates. She outlines the mouth and jaw shape, eye hole, nose and teeth with soft black pencil eyeliner, then takes her time detailing the large, disturbing teeth, which she paints onto her lips and the skin above and below them. “Outline each tooth with liquid eyeliner for precision. Add small triangular shapes in between them for depth and contrast, and thicken the outlines for emphasis.”
The rest of the skull effect takes only minutes, filling the eye socket and other sunken areas with black eyeshadow, and applying white creme makeup as “exposed bone.” Finally, she highlights the teeth with the white creme, and applies black eyeshadow around the mouth to make it look “creepy and sunken.”
Doing a “half face” adds to the shock value when you turn your head, notes Gates, who is very much looking forward to Halloween.
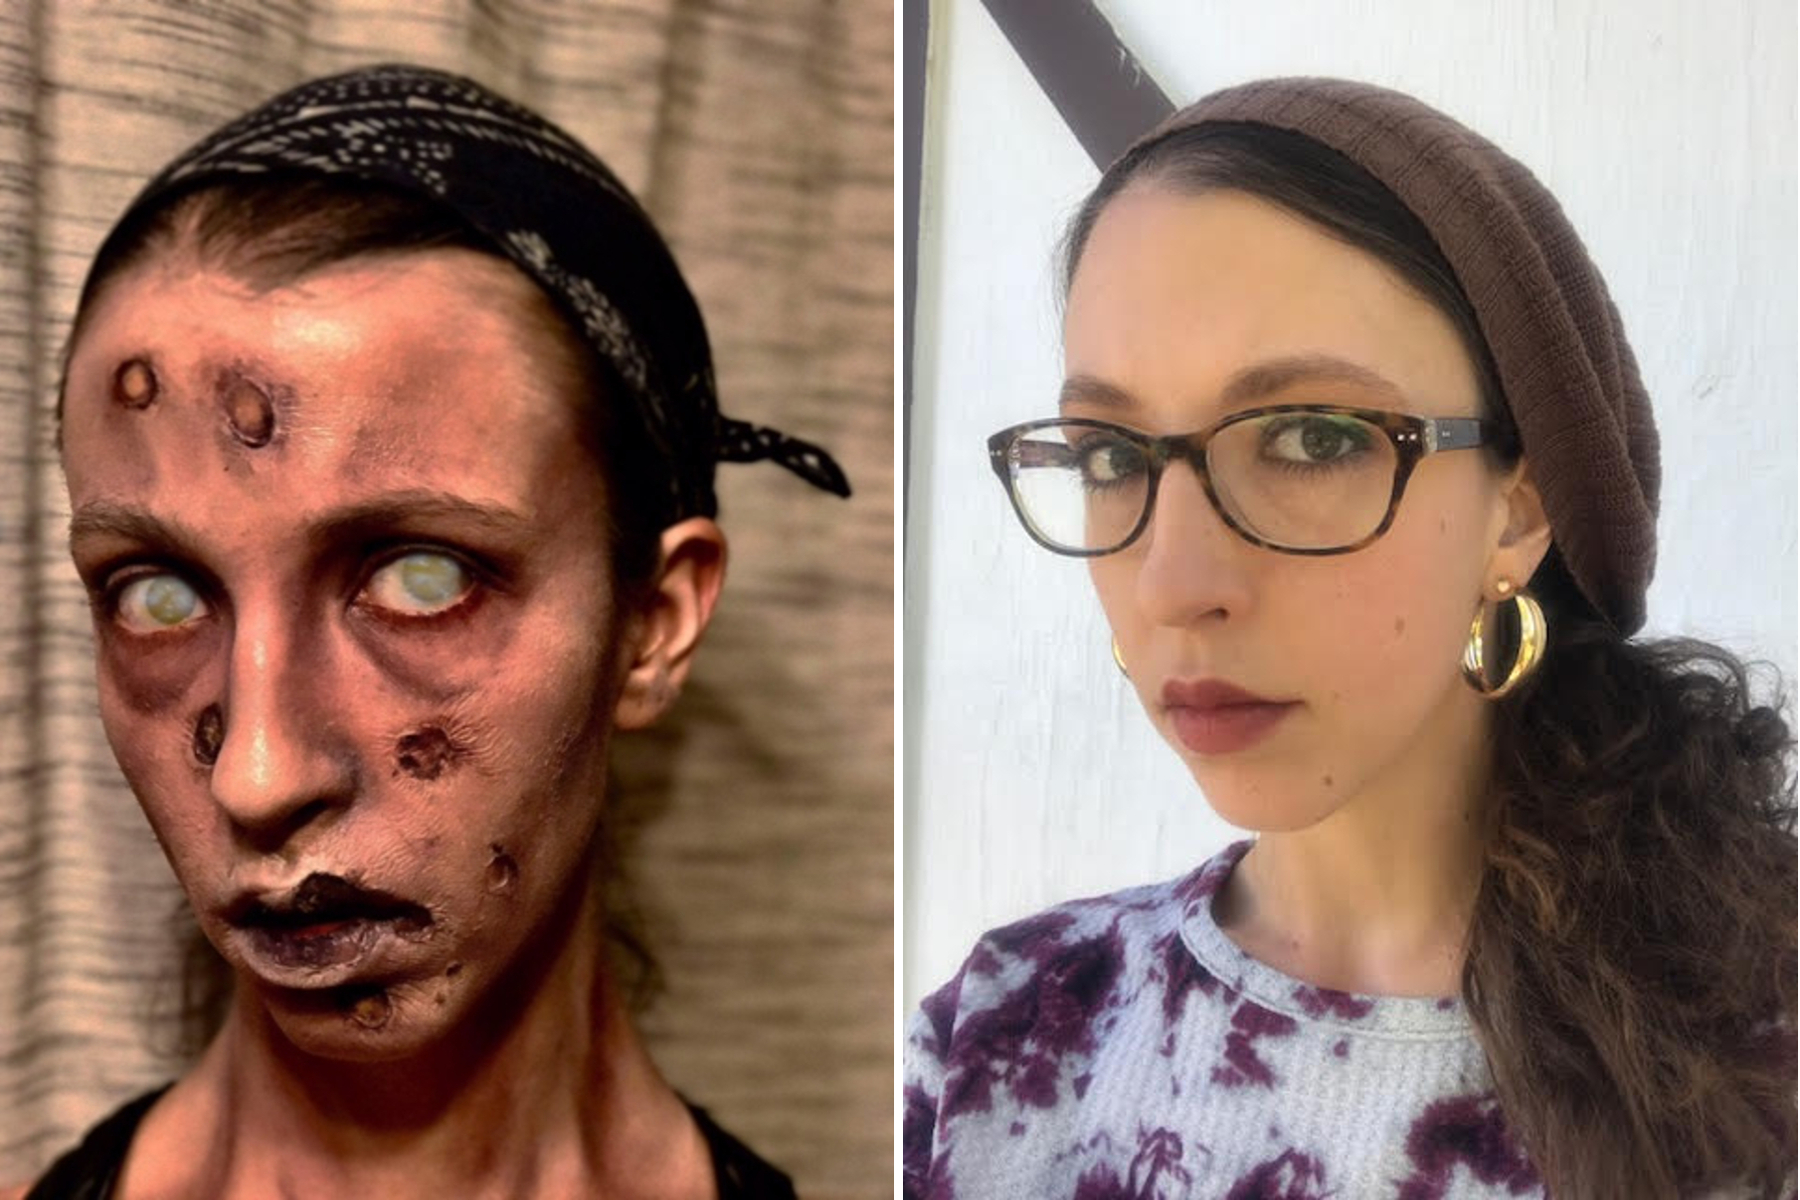
The Professional Zombie Look
“When I found a little ‘bruise palette’ in a Halloween store when I was 12, I had an ‘aha!’ moment,” remembers professional makeup artist KLT Stewart, who works on film sets around the Denver area. “I realized that all the injuries you see in movies and television were something that someone made.”
Zombification offers great opportunity for creativity, says Stewart, a student at the Colorado Film School in Denver. But “the zombie must have at least some basis in reality”—still a human, despite its deteriorating skin. As a pro, Stewart aims for “the most realistic, seamless makeups possible. There is very little margin for error in the brave new world of ultra high-definition television; makeup must be flawless.”
To create the special effects that “emulate a human body in a state of decomposition,” as she puts it, Stewart uses stage makeup products, available locally at Life of the Party, 4025 South Mason Street, Fort Collins, as well as online and at some Walmart stores.
First, she applies purple and blue powdered shadows to create sunken areas on the face and neck and reinforce hollows and crevices. Then she uses a cosmetic sponge to lightly dab, or “stipple,” Ben Nye-brand Death Flesh, a creme makeup, all over the shadowed areas. “It takes time and patience, but it creates a really cool see-through skin effect.”
Stewart applies “setting powder” and a sealant to make the effects last, and rubs grape Jell-O powder on the lips to stain them.
No self-respecting zombie would be caught dead without rotting flesh, and Stewart fashions it with liquid latex, available at most places Halloween makeup is sold. “Do not attempt this if you have a latex allergy!” she warns; latex allergies can be life-threatening.
Using a cosmetic sponge, she stipples three coats of clear liquid latex over the face, allowing it to dry between coats. “Avoid eyes, eyelashes, inner lips, eyebrows and hairline,” she cautions. After all the coats have been applied, “Make a few faces—stretch the jaw wide, smile big, wiggle your eyebrows—to stretch the latex and give a wrinkly, ‘decomposing’ finish to the skin.”
Finally, it’s time for the realistic rotting sores. “Wherever you think a little ‘rot’ would look good, use your fingers to rub firmly at the latex until it starts to peel up. Once you have a ‘bubble,’ use your fingernails or a pair of tweezers to carefully spilt the latex. It will peel back and stick to itself, creating a hole. Stipple a final coat of latex over these ‘rotted’ areas, and color them using a very small amount of a blue tone around the edges and a yellow tone in the middle. Apply setting powder, and seal. You’re done!”
Like all fans of ghoulishly creative makeup, Stewart is looking forward to the big night. “Halloween is definitely my favorite holiday! I always go all out.”